Magnumite
Ultimate Member
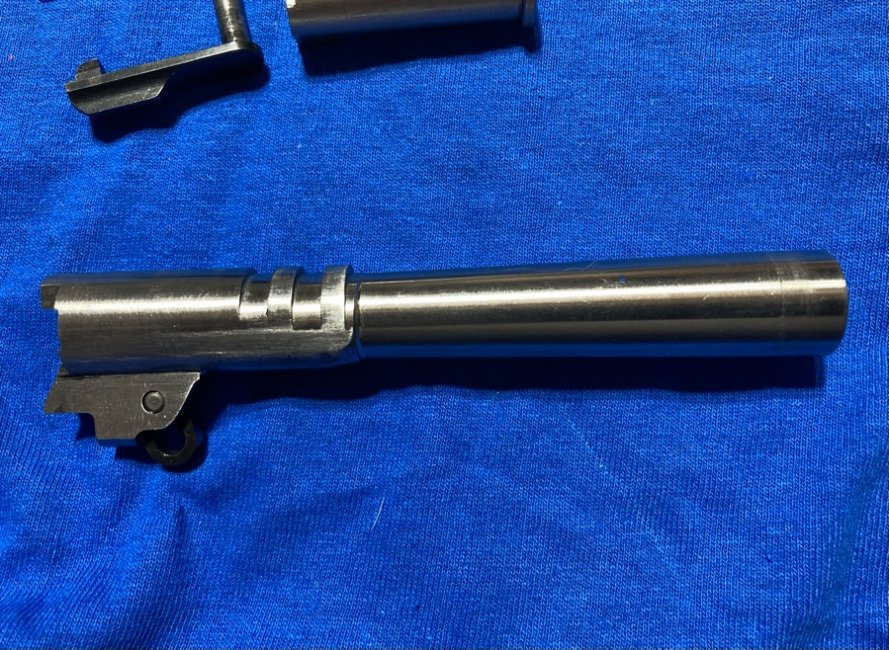
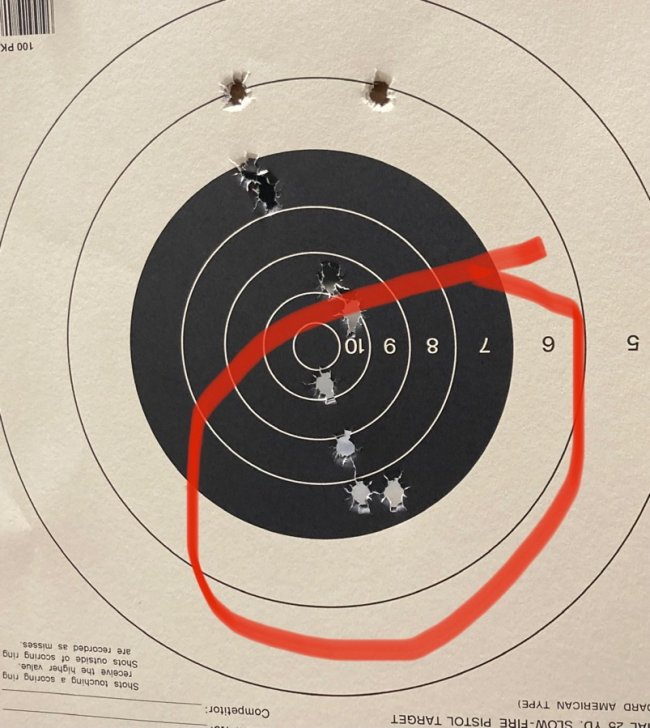
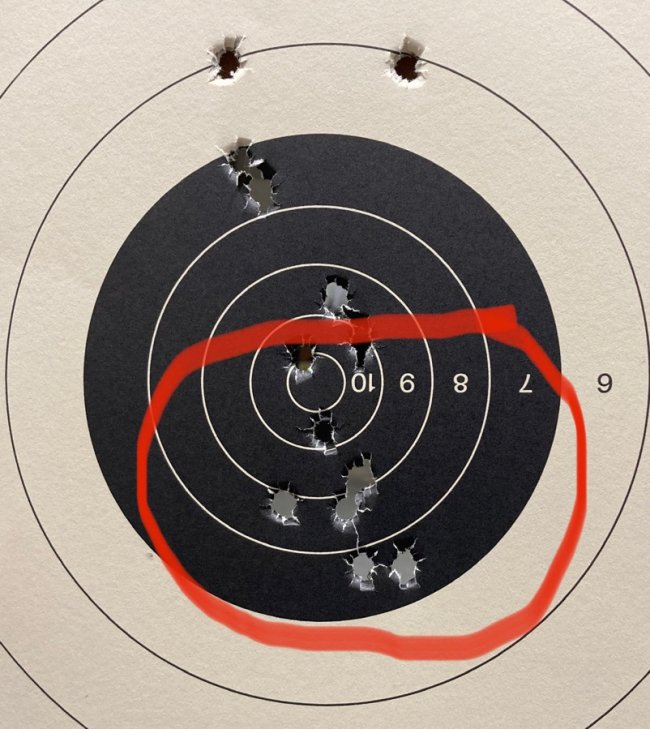
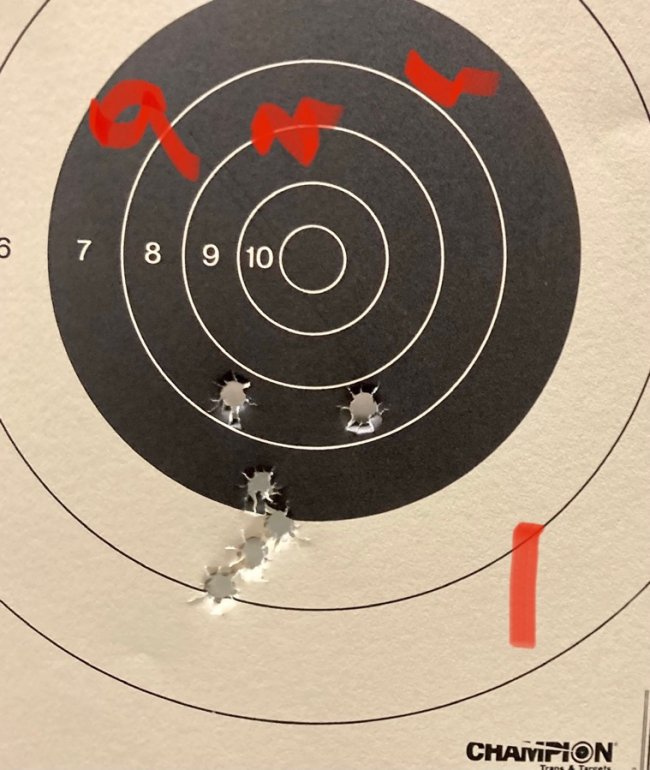
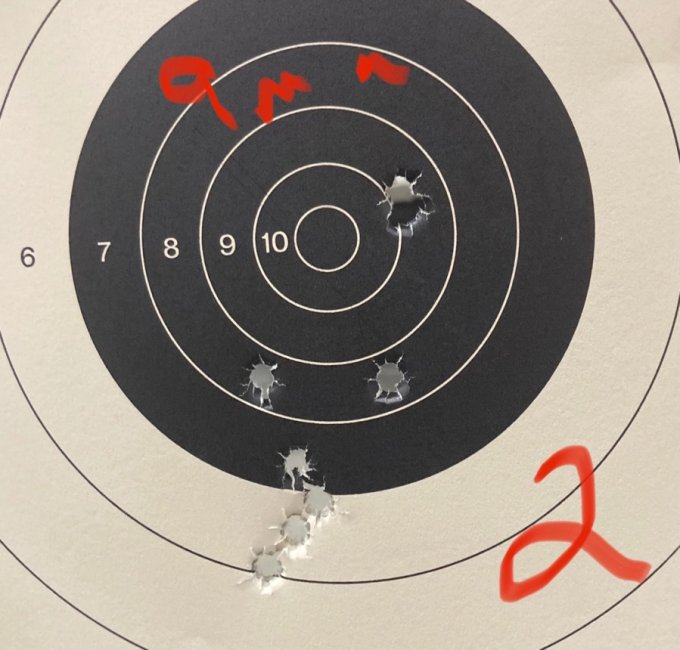
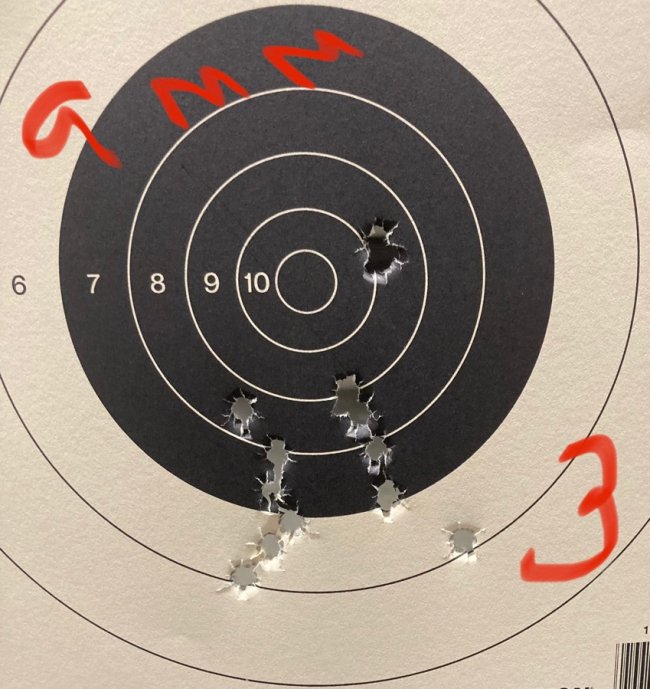
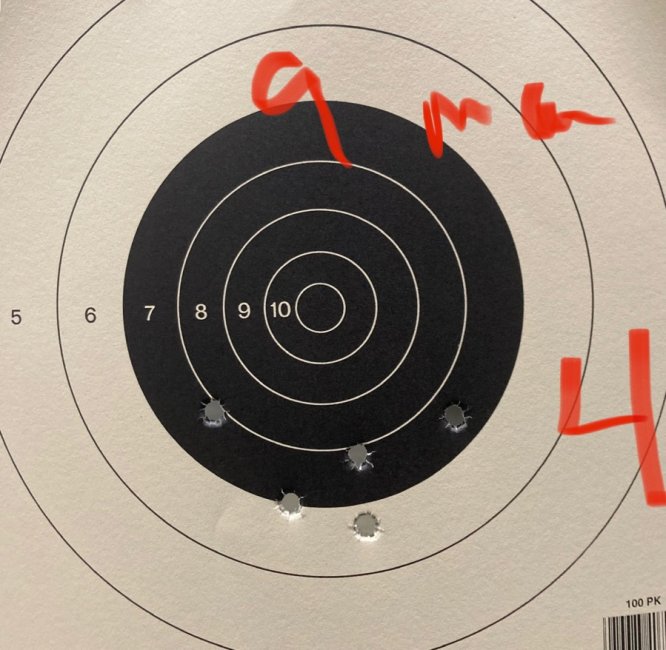
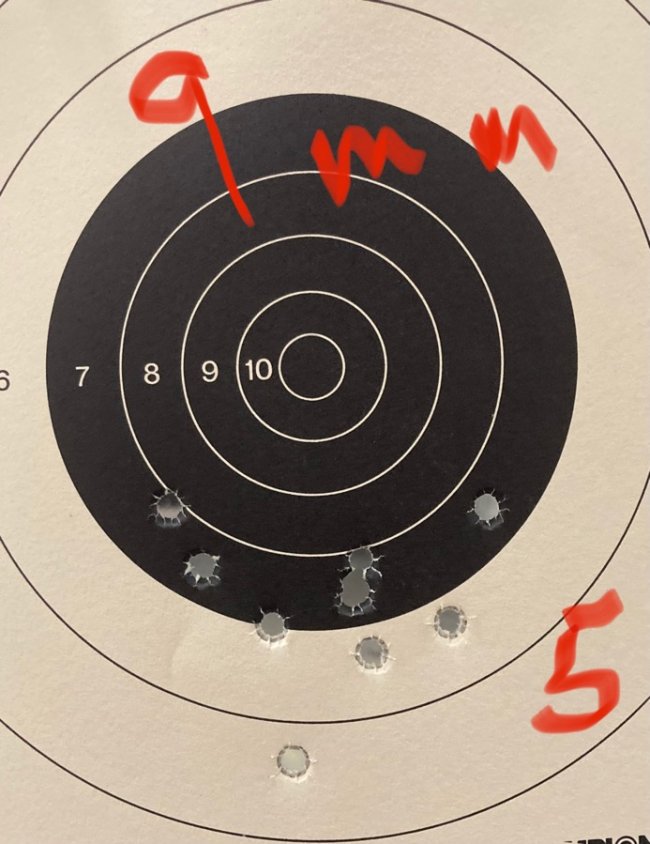
I have mentioned this pistol before. Shoots well enough with 124 grain and heavier bullets. I had the stock bushing barrel and a Kimber takeoff barrel fitted to this pistol. While the Kimber was a much better fit this pistol just did not group 115 grain bulk box acceptably…for me. I know the 115 grain blasting grade has a rep for indifferent grouping out of most guns. This one shoots a group of 9 shots but with 2-3 annoying fliers. The rest of the group is quite acceptable. The other Kart barreled 9 I built will put that bulk fodder into very nice groups. Call me spoiled or just plain lucky, I decided to fit a gunsmith fit barrel.
A good buy on a Storm Lake presented itself about 6 months back so I jumped on it. Not my first choice but…
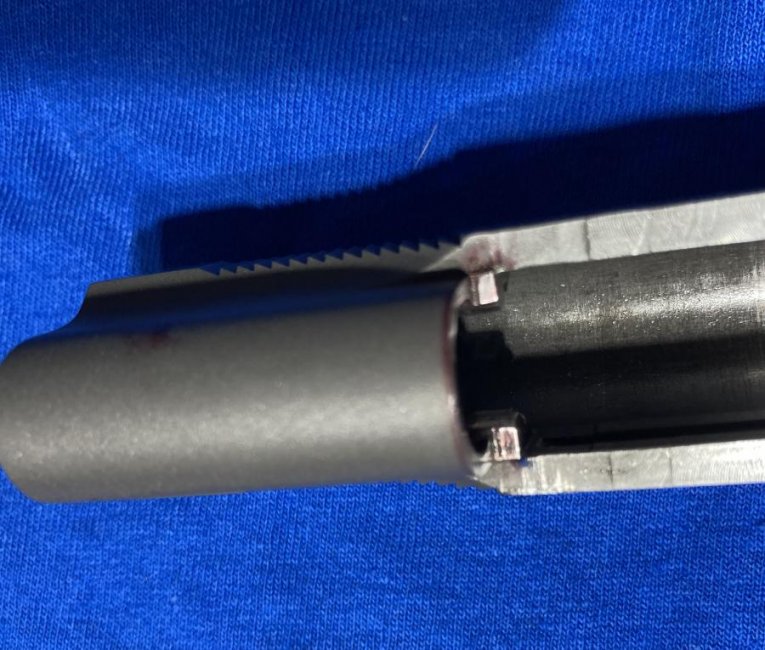
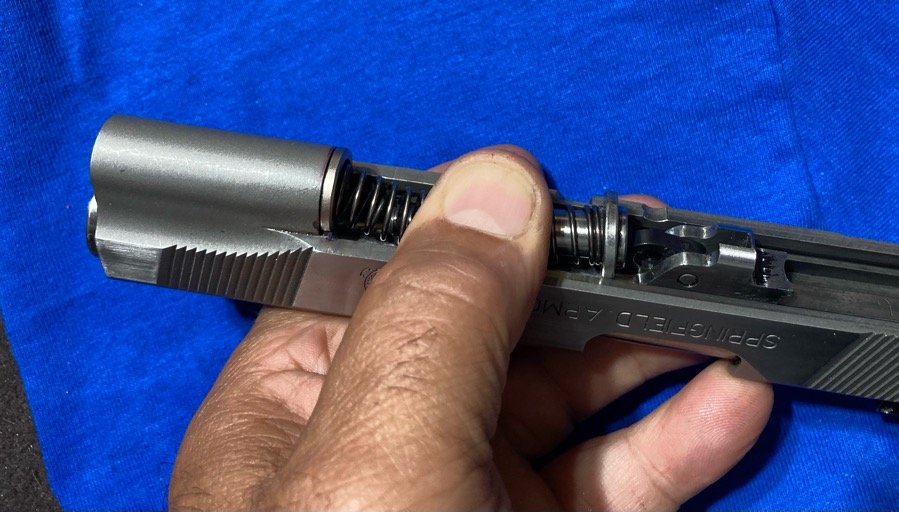
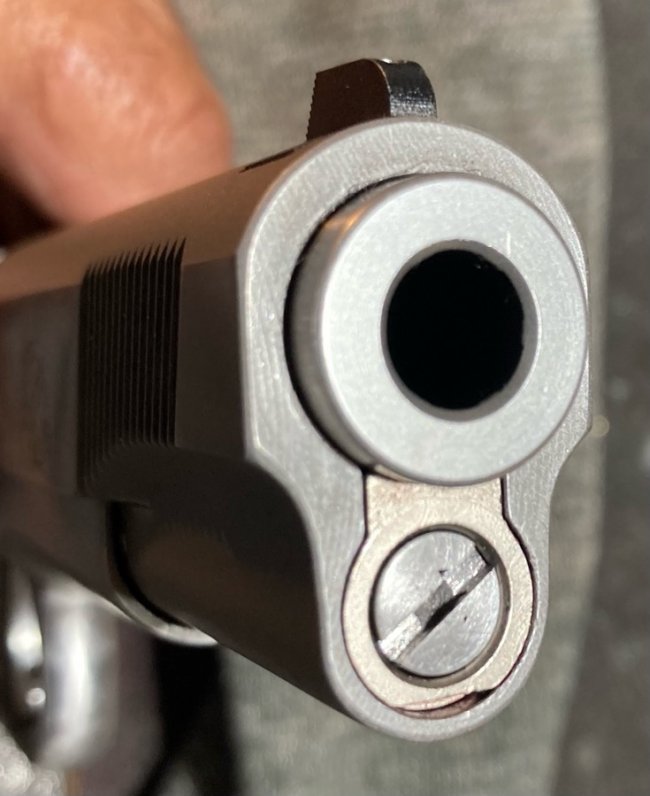
After fitting the barrel and link I needed to get the recoil spring system fitted. A bushingless barrel, I chose the flanged or top hat type recoil spring plug with the barrel support lug. To do this I had first ream away the spring plug ridge at the back of the slide spring tunnel. I used a nonpiloted reamer for this. Needless to say, I could not completely cut away all of the ridge, only the top lateral parts of the ridge since the reamer wants to walk up into the barrel bore of the slide. That meant a file would be needed to file out the remainder of the ridge.
The flanged recoil spring plug required about .085” of the rear of the recoil spring tunnel to be filed away. Machinist guys…I envy your tooling. Filing, checking,and measuring frequently to keep the rear square and perpendicular to the center line was done. I had an icepack nearby to cool off the calipers.
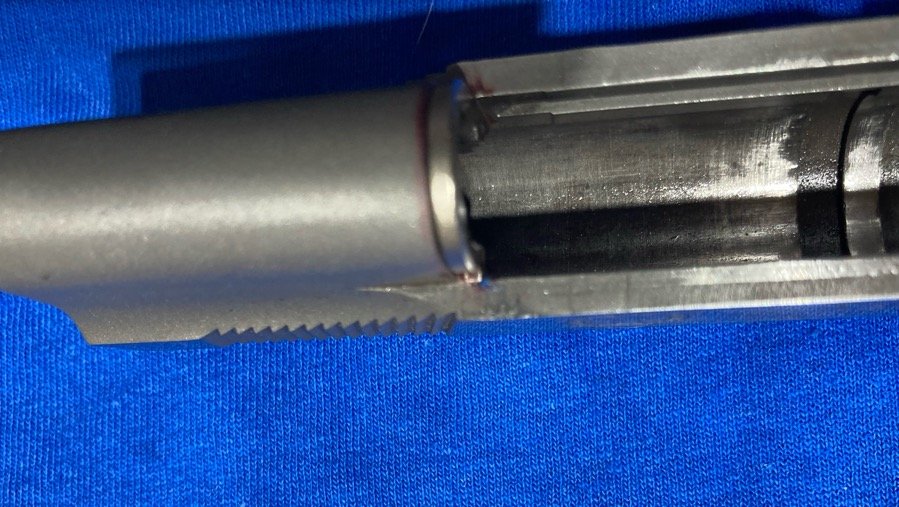
When I got close..within thousandths, I taped off the front of the slide recoil spring tunnel and filed the much thinner ridge remaining at the back of the spring tunnel. When the recoil spring plug would enter the tunnel I marked the back of the tunnel and installed the plug. Then I tapped the flange forward to identify the high spots. I marked, tapped, filed, repeat lotsa times to get the interface square.
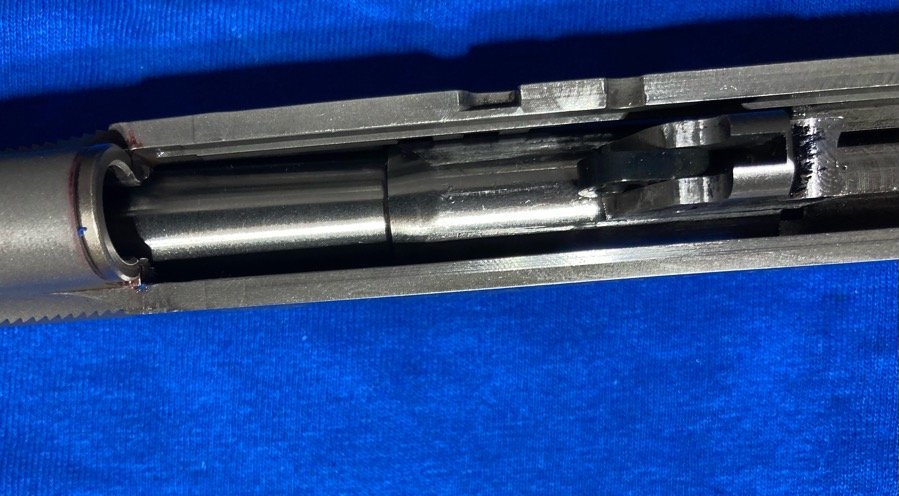
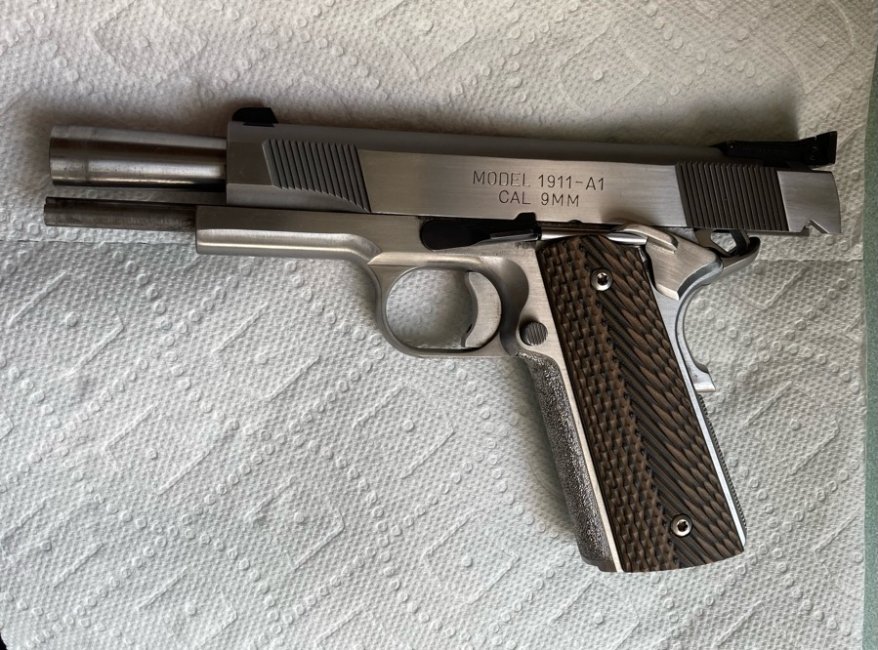
So it was guide rod time..I had determined I wanted a full length guide rod. Looking in the parts box, I just had the original two piece Springer item and a one piece withOUT the takedown hole. So I tried the two piece. It worked, of course. But even on a temporary basis I couldn’t deal with the appearance. The amount it and the barrel protruded from the slide made the pistol look like a trigger actuated cattle prod.
So like a good little tech who couldn't wait I shortened the front piece of the guide rod and slotted it with files. You can still see the remnants and machine centering of the allen wrench recess.
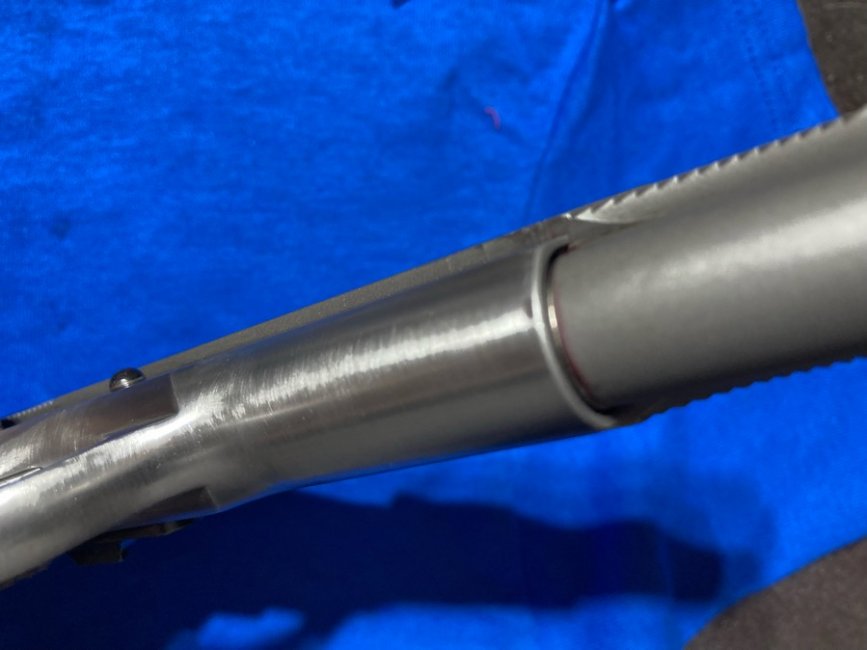
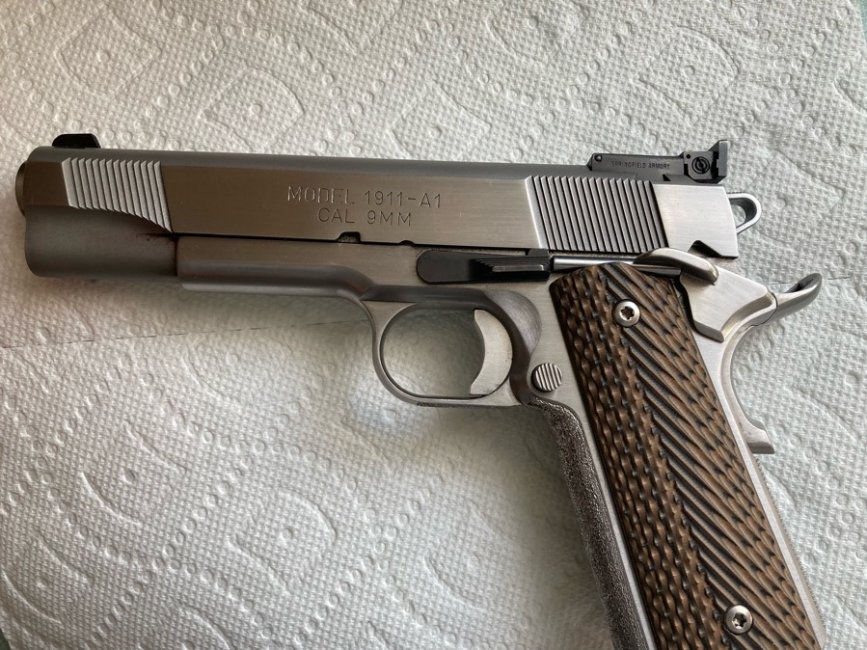
Time to test fire. Hope the pics make sense. One pic shows the seam line between the recoil spring plug flange and the spring tunnel on the assembled pistol.
A good buy on a Storm Lake presented itself about 6 months back so I jumped on it. Not my first choice but…
After fitting the barrel and link I needed to get the recoil spring system fitted. A bushingless barrel, I chose the flanged or top hat type recoil spring plug with the barrel support lug. To do this I had first ream away the spring plug ridge at the back of the slide spring tunnel. I used a nonpiloted reamer for this. Needless to say, I could not completely cut away all of the ridge, only the top lateral parts of the ridge since the reamer wants to walk up into the barrel bore of the slide. That meant a file would be needed to file out the remainder of the ridge.
The flanged recoil spring plug required about .085” of the rear of the recoil spring tunnel to be filed away. Machinist guys…I envy your tooling. Filing, checking,and measuring frequently to keep the rear square and perpendicular to the center line was done. I had an icepack nearby to cool off the calipers.
When I got close..within thousandths, I taped off the front of the slide recoil spring tunnel and filed the much thinner ridge remaining at the back of the spring tunnel. When the recoil spring plug would enter the tunnel I marked the back of the tunnel and installed the plug. Then I tapped the flange forward to identify the high spots. I marked, tapped, filed, repeat lotsa times to get the interface square.
So it was guide rod time..I had determined I wanted a full length guide rod. Looking in the parts box, I just had the original two piece Springer item and a one piece withOUT the takedown hole. So I tried the two piece. It worked, of course. But even on a temporary basis I couldn’t deal with the appearance. The amount it and the barrel protruded from the slide made the pistol look like a trigger actuated cattle prod.
So like a good little tech who couldn't wait I shortened the front piece of the guide rod and slotted it with files. You can still see the remnants and machine centering of the allen wrench recess.
Time to test fire. Hope the pics make sense. One pic shows the seam line between the recoil spring plug flange and the spring tunnel on the assembled pistol.
Attachments
-
 5D2F5E24-5C76-472D-9BD1-D9FC19228595.jpeg187.1 KB · Views: 192
 -
 88BADF6B-FDB4-410F-A383-A505BBE99223.jpg102.4 KB · Views: 181
 -
 E050EB11-8B44-4961-A6FD-AB4318AE931D.jpeg96.5 KB · Views: 174
 -
 C861FDEB-807E-4719-A15F-AD6591031ED4.jpeg77.2 KB · Views: 176
 -
 95E211FF-5843-41B7-88FF-57A40D161301.jpeg77.2 KB · Views: 184
 -
 3CD1A216-23C9-4019-B95E-FDB40943FF8A.jpeg78.3 KB · Views: 182
 -
 92B44703-DC36-4EDA-9054-6B73C66F5E5C.jpeg70.9 KB · Views: 183
 -
 DDA88EFC-1010-4E18-B020-8CA0AF1D7259.jpeg51.6 KB · Views: 174
")
 . Thank you! I think you build a comparable product.