FN SLP Loading Port Mods

The #1 community for Gun Owners of the Northeast

Member Benefits:

  • No ad networks!
  • Discuss all aspects of firearm ownership
  • Discuss anti-gun legislation
  • Buy, sell, and trade in the classified section
  • Chat with Local gun shops, ranges, trainers & other businesses
  • Discover free outdoor shooting areas
  • View up to date on firearm-related events
  • Share photos & video with other members
  • ...and so much more!
  • CrawfishStu

    Creeper
    Dec 4, 2006
    2,353
    Crofton
    I've decided to open things up a bit on my SLP after catching my thumb a couple of times.

    I did some searching and found some great ones......and a few not so great ones.
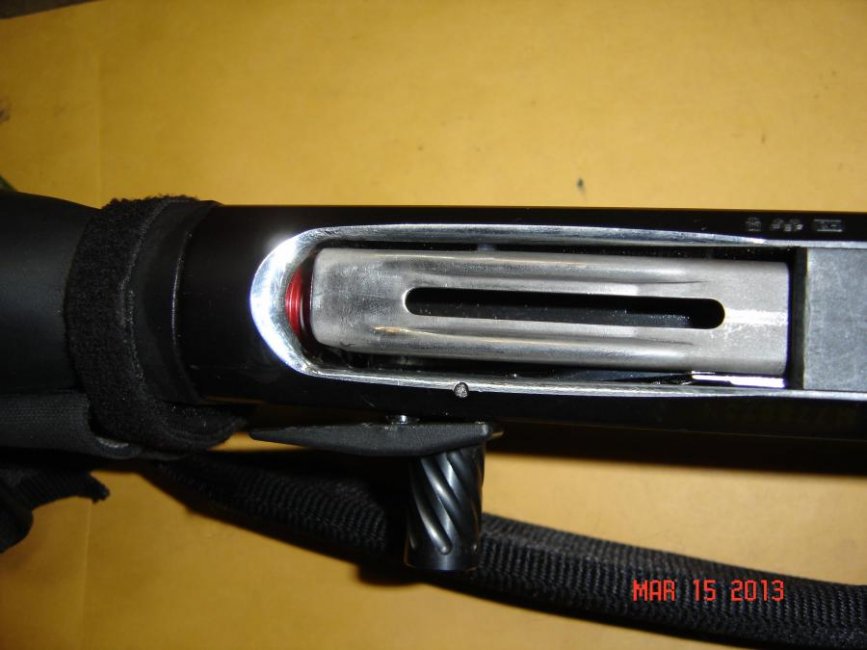
 :D

    Not great.....
    fnmod2_zps4c4c871a.jpg


    I'm not really sure what that guy was going for. He said it helped with weak hand loading.

    I'm looking to do more like this.

    fnmod1_zps3ac6d4cd.jpg


    fnmod4_zpsa0c64b6f.jpg


    fnmod3_zpsce5439d1.jpg


    fnmod5_zpsd9433ff7.jpg


    fnmod6_zpse00b2d98.jpg


    I plan on pulling my lifter and filling in the super thumb grabbing fork. Welding. Though I have to say that the one guys JB Weld job looked like it would be nice with a little smoothing.

    I'm to understand that the SLP is a little picky about adding weight to anything that moves. So I was thinking of cutting out the lifter a little to compensate for the added weight.

    fnmod7_zpscae7f76b.jpg


    As much as I like doing stuff myself, I might actually send this off to have this guy do the carrier mod.

    http://www.c-rums.com/Carriers.html

    I was thinking of welding my little plate under the lifer and blending the edge that you would touch to avoid issues with the fork not stabilizing the round before chambering as mentioned here.
    http://www.brianenos.com/forums/index.php?showtopic=138126

    I took the gun apart today and started work with a rounded hand file. I wish I had a slightly bigger or slightly smaller file than the ones I had. So, I stopped and decided I would look for a different file. I would really like to do this by hand and not with my dremel.

    Anyone that has done this and wants to chime in with advice. Please do.
     

    CrawfishStu

    Creeper
    Dec 4, 2006
    2,353
    Crofton
    Instead of welding a small piece in where the fork is like this.

    fnmod9_zpsfc72c7f8.jpg


    I would like to put a small square on the bottom so it retains the fork on top that stabilizes the shell.

    Then ramp and blend the new piece so it is almost as smooth as this.

    fnmod10_zps31325d8f.jpg
     

    Kjdowning18

    Member
    Oct 23, 2012
    45
    Red Lion, PA
    I had my lifter welded by crum.... They did a great job... As u stated admit weight is not good on the fn..... I had shells hanging up at the 2-3 o'clock position as they entered the barrel.... I fixed this with a little grinding on the top side of my lifter to guide the shells more towards the 9 o clock position as entering the barrel and also changed my carrier dog spring out for 2 glock extractor springs which has much more tention.... Now my fn runs great.... Eats everything I can throw at it even cheap bulk!
     

    CrawfishStu

    Creeper
    Dec 4, 2006
    2,353
    Crofton
    I got bored with using a file fast. I broke out the sanding drum and was happy with how controllable it was. It gets easy to start taking a lot off with that. So you need to be careful. It also tends to pull you when profiling the curve so it's easy to get it lopsided. Just take your time. I used the file to fine tune my angles. Then went over it with some wet dry. I want to blow it out and get it together to see how I like it or if it needs a hair more before I do the final polishing. I like it.

    20130317_220244_zps3644fb59.jpg


    20130317_220240_zpsc3ef5f16.jpg


    20130317_220246_zps307ed23e.jpg
     

    CrawfishStu

    Creeper
    Dec 4, 2006
    2,353
    Crofton
    I had my lifter welded by crum.... They did a great job... As u stated admit weight is not good on the fn..... I had shells hanging up at the 2-3 o'clock position as they entered the barrel.... I fixed this with a little grinding on the top side of my lifter to guide the shells more towards the 9 o clock position as entering the barrel and also changed my carrier dog spring out for 2 glock extractor springs which has much more tention.... Now my fn runs great.... Eats everything I can throw at it even cheap bulk!

    The more I read about this, the more I'm finding that the forks really are serving a purpose. Do you think your issue was that the shell was not centering up on the bore and was being jammed?
     

    CrawfishStu

    Creeper
    Dec 4, 2006
    2,353
    Crofton
    So, I touched this thing wrong apparently and "spring".....

    20130318_092525_zps5acd95f2.jpg


    I don't see how it really retains in place or how to put it back in. Seems like it should have like 2 more parts.

    This was a crappy interweb pic that I found.
    fnmod12_zps4c412148.jpg


    One of the button ends has a tang on it that can go inside the lifter dogleg either up or down. Don't know which way it goes.
    You can see it in this pic.
    20130318_092521_zpsb9f7d85e.jpg

    See how it can tuck in there.
    20130318_092456_zps350266a9.jpg
     

    jbollman

    MDCreeper
    Jul 9, 2009
    239
    Sounds like there is a small Detent pin:

    "It is fairly simple to reverse the safety. Pull out the trigger group, and just above the safety, there is an odd shaped spring inletted into the guard itself. Carefully pull this straight out with needle nose pliers, being careful to grab the detent pin above it. Noting how the spring is located on that side, pull safety out and put it in the other side of the trigger guard, then put detent pin and spring in over the safety on the opposite side of the gun of which it was removed. Not the greatest directions, but it really is that easy. It is good to know how to do this, because the spring and detent area tend to collect gunk making the safety very hard to move. Good luck."
     

    CrawfishStu

    Creeper
    Dec 4, 2006
    2,353
    Crofton
    Sounds like there is a small Detent pin:

    "It is fairly simple to reverse the safety. Pull out the trigger group, and just above the safety, there is an odd shaped spring inletted into the guard itself. Carefully pull this straight out with needle nose pliers, being careful to grab the detent pin above it. Noting how the spring is located on that side, pull safety out and put it in the other side of the trigger guard, then put detent pin and spring in over the safety on the opposite side of the gun of which it was removed. Not the greatest directions, but it really is that easy. It is good to know how to do this, because the spring and detent area tend to collect gunk making the safety very hard to move. Good luck."

    Found it. I would not call it small. It's about the length of the whole spring. It hoops around the lower swivel and goes in like a pin in the upper swivel.

    20130318_100932_zps5038fd5a.jpg


    20130318_100818_zps41062cb1.jpg


    fnmod13_zps645ef2d3.jpg
     

    CrawfishStu

    Creeper
    Dec 4, 2006
    2,353
    Crofton
    So, I pulled the lifter and decided I was going to weld it up and cut a slot in it myself.

    I procured a small piece of suitable stainless. I then drilled some holes as a guide for my slot. I really wondered if the slot was going to remove enough weight to balance out the piece of metal I wanted to add. Since I wanted to overlay the bottom of the lifter at least past the fork to keep the fork on the upper side, yet wanted to not have an edge to catch my thumb on.

    I weighed out a small strip of metal about the size of the slot. Then the piece I intended to weld on. It was much heavier. So I came back to the idea of an epoxy. I decided to use some thin uhmw that I had for body panels on a rock crawler. The holes I drilled in the lifter would actually do a great job of helping the epoxy stick while filling them back in so a shell would not snag on them. The uhmw and glob of epoxy also weighted less than the piece of metal I wanted to weld on.

    I used a hard set epoxy, prepped the surface, and let it set nice and hard. Then began shaping and sanding.

    It still needs a little work/filling/sanding but I test fit it and I like it a lot. Feeds dummy shells perfectly into the tube and the gun.

    20130321_005636_zps665b25d6.jpg

    20130321_005646_zpsf50d11d5.jpg

    20130321_005657_zps275e2d32.jpg
     

    jbollman

    MDCreeper
    Jul 9, 2009
    239
    So we cut my mine tonight. I can not believe the difference it makes. Well worth the time to do.
    Forgot to take photos, but Will later.
    Thanks Stu.
     

    Users who are viewing this thread

    Forum statistics

    Threads
    275,552
    Messages
    7,286,147
    Members
    33,476
    Latest member
    Spb5205

    Latest threads

    Top Bottom