I have this old 03

The #1 community for Gun Owners of the Northeast

Member Benefits:

  • No ad networks!
  • Discuss all aspects of firearm ownership
  • Discuss anti-gun legislation
  • Buy, sell, and trade in the classified section
  • Chat with Local gun shops, ranges, trainers & other businesses
  • Discover free outdoor shooting areas
  • View up to date on firearm-related events
  • Share photos & video with other members
  • ...and so much more!
  • Doco Overboard

    Ultimate Member
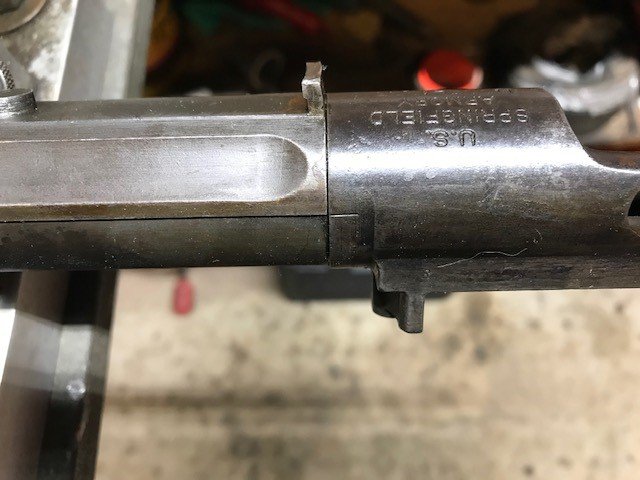
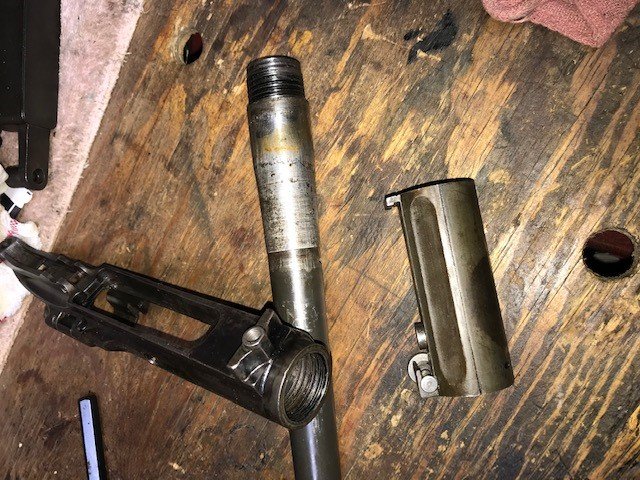
    I have this rifle that lives as a mannequin for spare parts and sometimes goes to the range with its brothers and cousins from the arsenal of democracy.

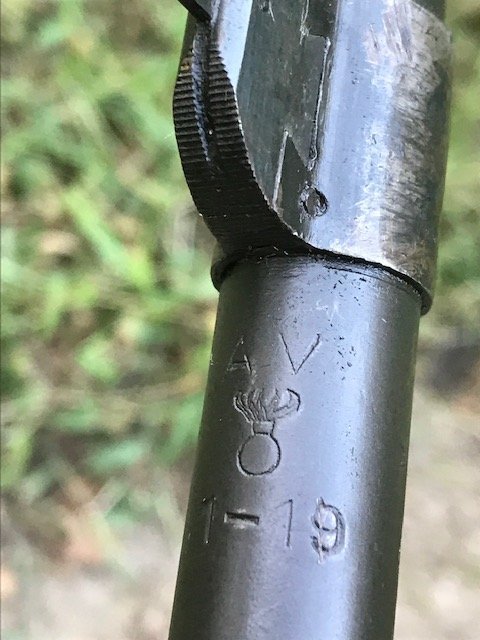
    When I initially put it together I used an Av replacement barrel and sistered it up to a MK 1 receiver I bought at a flea market.

    Anyhow, the barrel loses accuracy with fouling after about 15 -20 rounds and it needs to be replaced. Muzzle is frosty and throat is worn and all that good stuff. It can do better and is a worthy project.

    Additionally the barrel bedding needs improvement/adjustment which I'm sure would improve performance but I have a decent rebuild barrel on hand that I could swap and have some fun at the same time.

    I was going to send it to Doco's little shop of horrors and do an amateur barrel swap, pictorial and demonstrate how I transfer the rear collar, FS base, qualify HS and generally go through the rifle if anyone is interested to see how it goes.

    If anybody is interested just say so and we can all follow along and see how it can be done at home with a few tools, a bag full of rifle bolts and a camera phone.
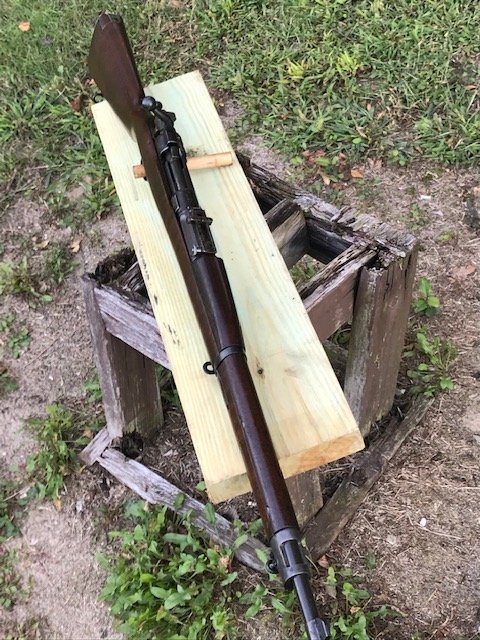
    Project 03.jpg

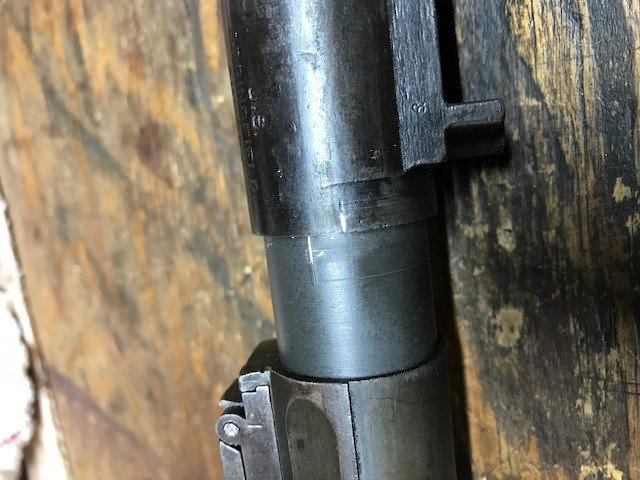
    Project 03-1.jpg
     

    TheOriginalMexicanBob

    Ultimate Member
    Jul 2, 2017
    32,795
    Sun City West, AZ
    ANYTHING 03 is worth watching, while I much prefer the 03A3 sights I'll follow along. :thumbsup:
    Good luck!

    Gotta agree. '03s in any form are awesome rifles. It's not often one is found that can't shoot great but wear and tear does take its toll. It's not difficult to find NOS '03A3 barrels but original '03 barrels are pretty hard to source...at least at a reasonable price.
     

    noddaz

    bonehead
    Jan 9, 2014
    533
    Arnold
    Wait, you want to do a barrel swap and you have to ask if we want to see?

    Why yes, I most certainly do.
     

    Doco Overboard

    Ultimate Member
    Ok we'll get on with it then.
    No tellin what we'll have to do but one thing will be for sure..... I ask for a volunteer to test fire it!

    Just kidding!

    We'll spot any problems along the way and seek the advice of a professional when we need it.
    The difference between a good Bubba and a bad one is knowing when your out of your lane and not being afraid to humble yourself or ask questions.
    And then stop when you have to.

    Thats the real purpose of the thread. To ask questions, provide feedback and sling lead at the 300 yd gong target when were done.

    And then be able to go back again another day and do it again.
    Then pass on a decent safe rifle to someone else one day.
     

    Doco Overboard

    Ultimate Member
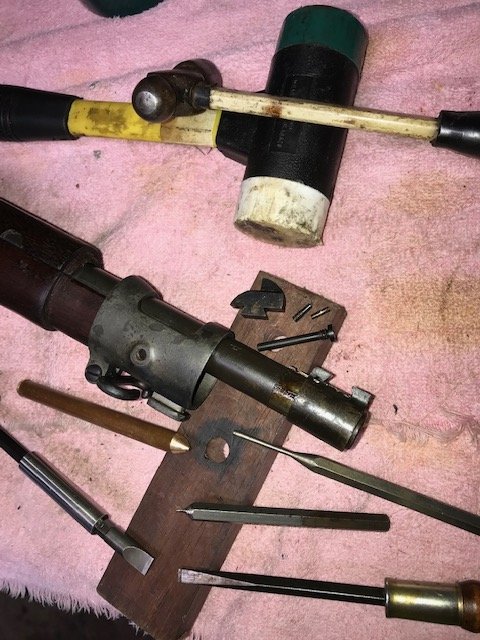
    Alright, tear down begins,
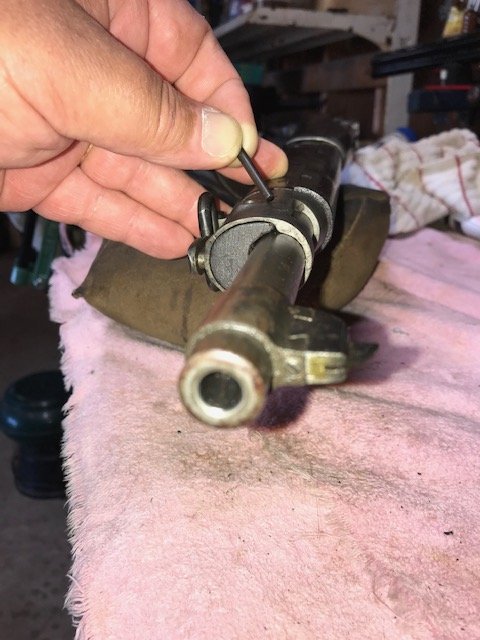
    The 03 front band is captured with a screw inserted through the starboard side to the left. This is important because when removing screw, pins- dovetail sights and such generally this is the practice. They will be reinstalled from left to right.
    Also although somewhat blurry is the dovetail front site screw. its located on the site band just below the sight base directly in the front. The very small screw can normally be removed with a precision screw driver or a tiny hollow ground screw driver when they are extra tight. You'll see them crudely made to finely made and some time broken which is a real pain to get them free.

    IMG_1896.jpg

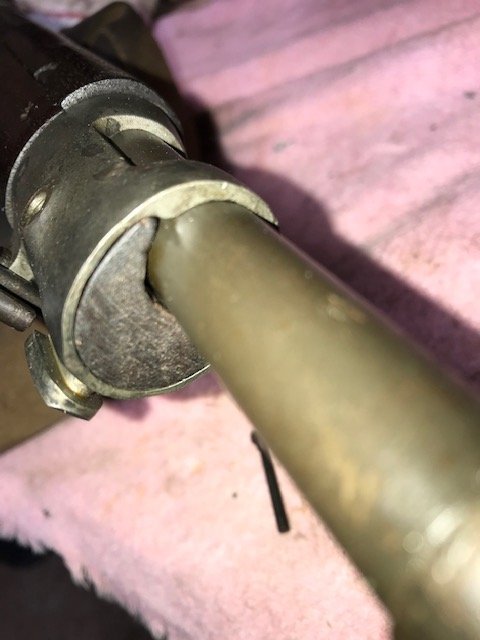
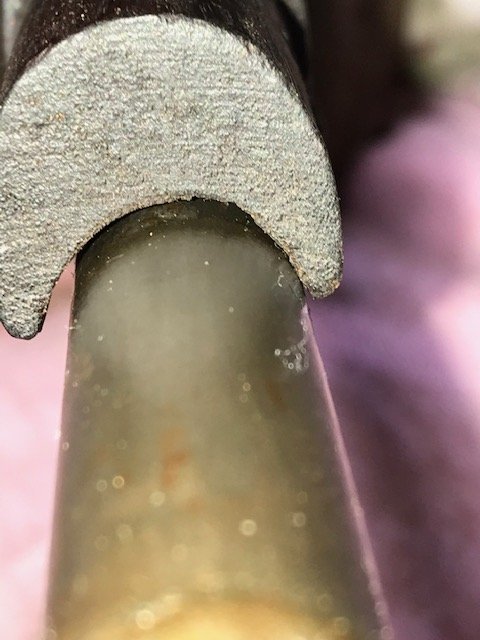
    See that gap where the bedding at the barrel is only very slight? That's the real problem regarding repeatability with this one. It shoots relatively accurately- just not when it gets hot and with a fouled barrel. The upper band is a poor candidate to control barrel pressure. More on that later.


    IMG_1898.jpg

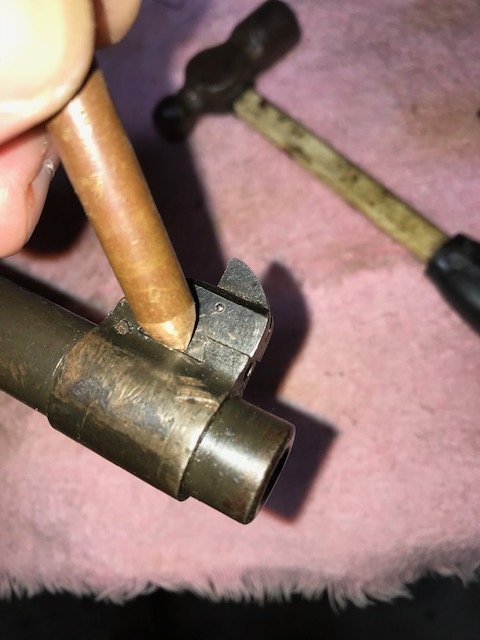
    Drift front site dovetail right to left gently, we don't want to beat that dovetail up and wind up with a loose front site. The fit to the dovetail is what prevents unwanted movement or wobble. Not the little screw, that just keeps it from falling off the band. There is a little pin just to the left of the punch that is fit through a spline. That pin needs removed.

    IMG_1901.jpg

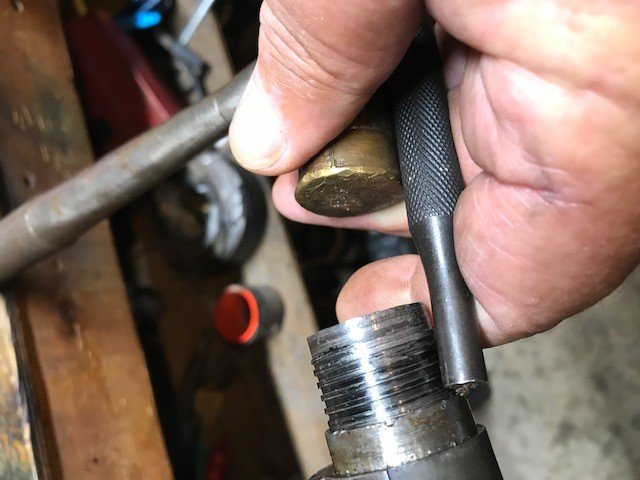
    Gently drift the front site and upper band off the barrel and timber. Easy does it, they don't make this stuff anymore. I use a brass punch that just got dressed down (actually it a hasp from a key-less Masterlock) works wonderfully for this sort of thing. Cheap, can grind to shape and just hard enough to give it a wack when you need it with squashing out your site base or the punch with just enough give for this old junk.
    That sight band again has a very small pin, sometimes contoured to the shape of the FS band. Drive it out with starter punch and then a longer one. If the pin is hard to see, daub it with cold blue to make it easier, there are two different bands, early and late-pin in front and some in rear. You'll see it, but don't gorilla it, remember.... reassembly that you can hardly tell.
    Use a penetrant like Kroil.

    IMG_1903.jpg

    See that gap? Thats the problem but nothings going to stop us now!

    IMG_1906.jpg
    Correctly fitting, that's the name of the game. Sometimes you have to do what you have to do and that's grind one to fit!


    IMG_1915.jpg
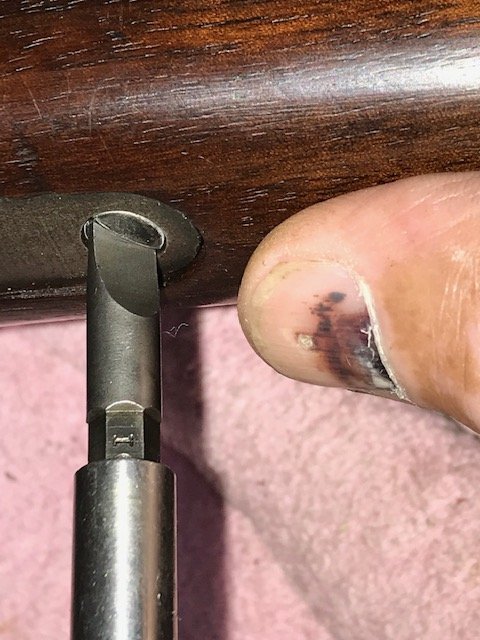
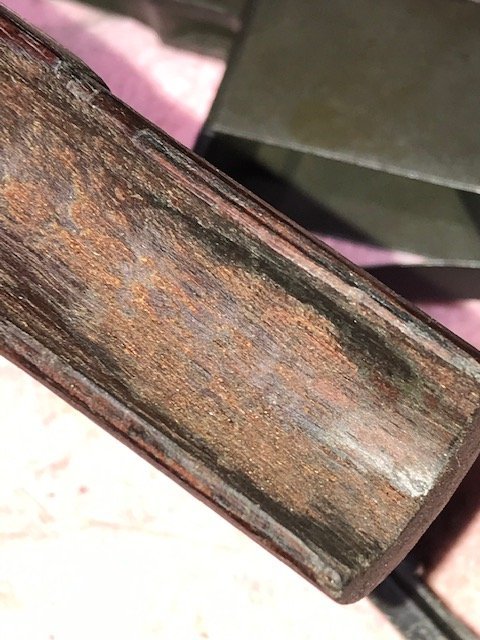
    Oh the horror! The bearing should be at the bottom of the in-letting not on the side! We'll fix that as we go.

    IMG_1916.jpg
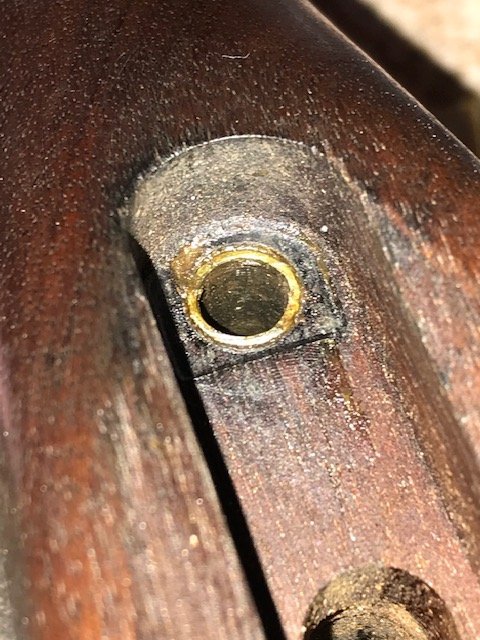
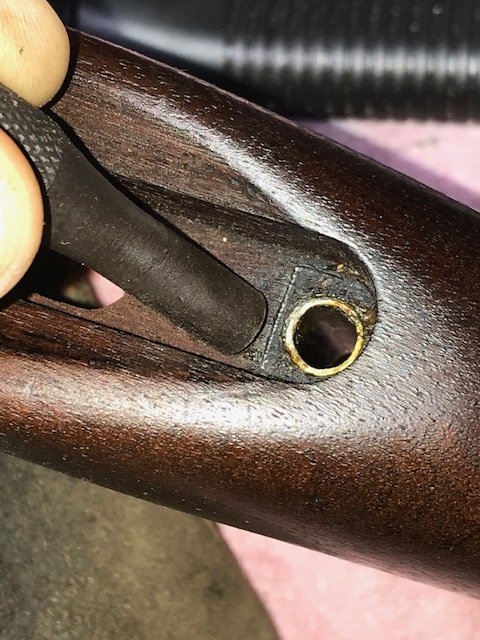
    Wood compression at the stock ferrule. Well have to push that out with a punch that fits the diameter of the ferrule but not so large in diameter to enlarge the hole drilled through the stock. it should fit tight and fall out or be ovalled.
    Not exactly part of a barrel swap but we can walk and chew gum at the same time.

    IMG_1917.jpg

    IMG_1918.jpg
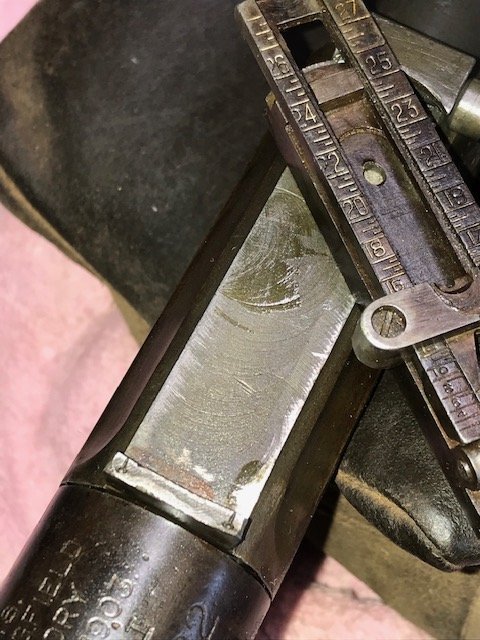
    Rotate the windgage yes that's right, windgage worm screw to the left to move the rear base to the right and then simply lift up on the rear site until its free from the collar and the gear clears the screw.

    IMG_1919.jpg

    Couple more steps on the next post...... then well be done for the night.
     

    Doco Overboard

    Ultimate Member
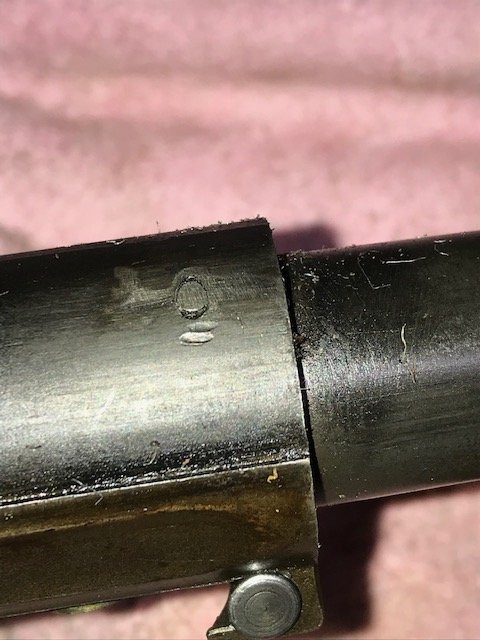
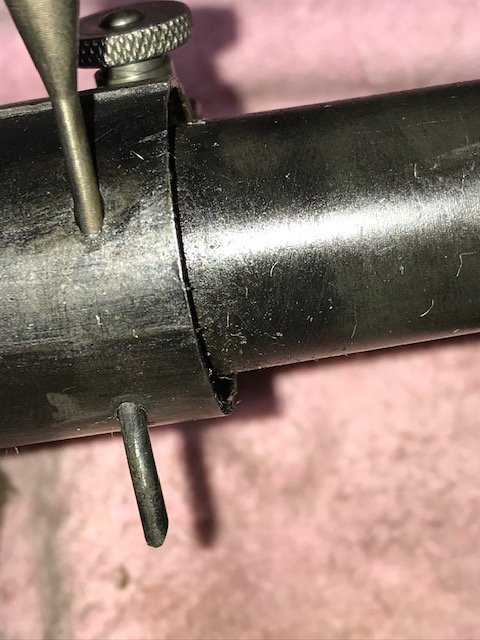
    Just like on the front site band retaining pin, there is a pin that is transversely placed through the rear sight collar. We need to locate and carefully drive that pin out.
    On a parked barrel or a finely blued one that pin is very difficult to see. Make sure it can be seen clearly and deftly removed so the collar doesn't take a beating.
    There is another pin located at the rear of the collar that is placed parallel to the bore that helps keep the collar more rigid and and reduces the possibility of the collar rotating with rough handling.

    The pin, once the collar is indexed on a factory assembly, is drilled in between the barrel and the partly through the surface of the collar.
    When the collar comes off you can see how it appears.

    The transverse pin is usually located right below the windgage screw towards the front of the collar. The pin just kisses the bottom of the barrel as it goes through. The other location cannot be seen yet.
    There will be a slight angled groove at the front of the receiver ring between 11 and 1 o'clock usually.

    IMG_1920.jpg

    IMG_1921.jpg

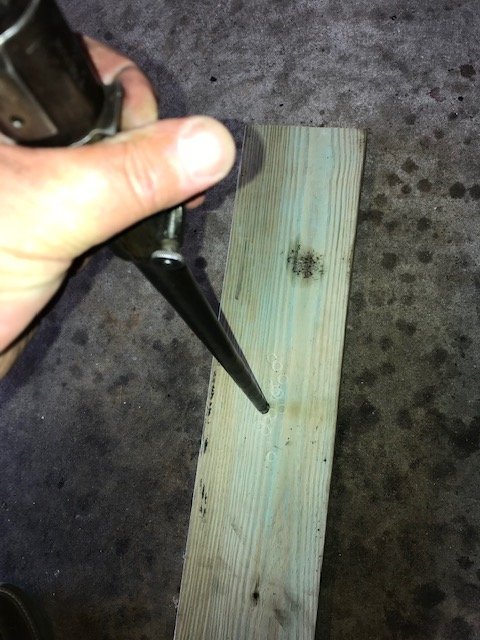
    If your lucky... you can grip the collar kung -fu style and drive the barrel downwards onto a block of wood to free the collar from its position on the barrel.
    Chuck in Denver approved! You can barely see a few muzzle whacks but....
    I cant get this one to budge either from having weak hands, soft wood or someone must have done someone something bad to make this collar hold fast like it is.
    I put some Kroil and a little heat to it to free it but I cant get it off. More than likely I punch peened the barrel journal to help hold it fast. We'll see when it comes off but were going to have to pull the barrel and drive it off from the rear with a close fitting cave man style tool made from a piece of pvc pipe, a wood block socket or something that fits inside the radius just inside the exterior of the collar.
    I might even have made a rear fit pin that was driven in the back it's been awhile I cant remember.


    IMG_1924.jpg
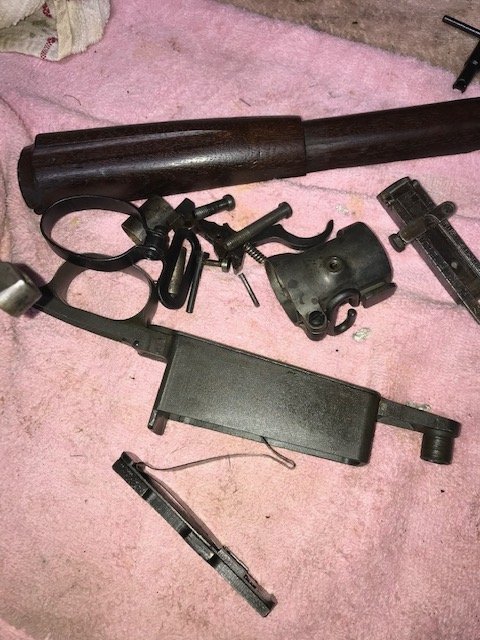
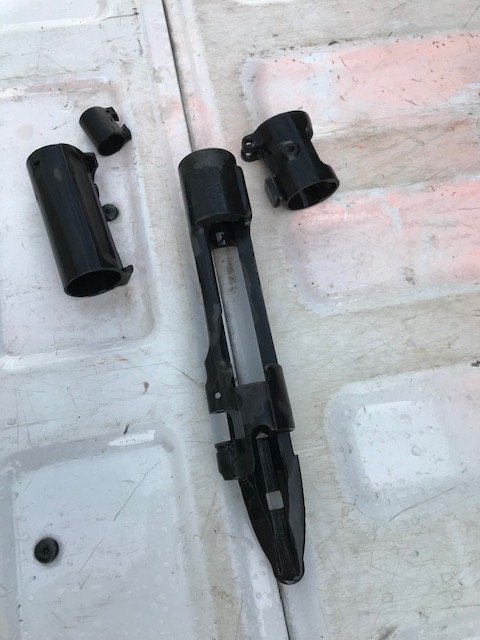
    When your done. You should have a pile of parts that looks something like this. Keep together and move off to the side... some of the pins and screw are small.
    Meanwhile, soak the milling in the barrel channel with Linseed oil and turpentine to expand the wood fibers out to help out with getting some upwards pressure at towards the muzzle.
    Put it to the side to soak so no one runs a four wheeler into and turn it to match sticks when your not looking.

    IMG_1925.jpg

    We can pull the barrel off and knock the collar off tomorrow night or maybe the next day.
     

    bigmancrisler

    2A Preacher
    Jun 4, 2020
    1,263
    Martinsburg, WV
    Just like on the front site band retaining pin, there is a pin that is transversely placed through the rear sight collar. We need to locate and carefully drive that pin out.
    On a parked barrel or a finely blued one that pin is very difficult to see. Make sure it can be seen clearly and deftly removed so the collar doesn't take a beating.
    There is another pin located at the rear of the collar that is placed parallel to the bore that helps keep the collar more rigid and and reduces the possibility of the collar rotating with rough handling.

    The pin, once the collar is indexed on a factory assembly, is drilled in between the barrel and the partly through the surface of the collar.
    When the collar comes off you can see how it appears.

    The transverse pin is usually located right below the windgage screw towards the front of the collar. The pin just kisses the bottom of the barrel as it goes through. The other location cannot be seen yet.
    There will be a slight angled groove at the front of the receiver ring between 11 and 1 o'clock usually.

    View attachment 294791

    View attachment 294792

    If your lucky... you can grip the collar kung -fu style and drive the barrel downwards onto a block of wood to free the collar from its position on the barrel.
    Chuck in Denver approved! You can barely see a few muzzle whacks but....
    I cant get this one to budge either from having weak hands, soft wood or someone must have done someone something bad to make this collar hold fast like it is.
    I put some Kroil and a little heat to it to free it but I cant get it off. More than likely I punch peened the barrel journal to help hold it fast. We'll see when it comes off but were going to have to pull the barrel and drive it off from the rear with a close fitting cave man style tool made from a piece of pvc pipe, a wood block socket or something that fits inside the radius just inside the exterior of the collar.
    I might even have made a rear fit pin that was driven in the back it's been awhile I cant remember.


    View attachment 294793
    When your done. You should have a pile of parts that looks something like this. Keep together and move off to the side... some of the pins and screw are small.
    Meanwhile, soak the milling in the barrel channel with Linseed oil and turpentine to expand the wood fibers out to help out with getting some upwards pressure at towards the muzzle.
    Put it to the side to soak so no one runs a four wheeler into and turn it to match sticks when your not looking.

    View attachment 294794

    We can pull the barrel off and knock the collar off tomorrow night or maybe the next day.


    These kinds of posts/threads are really some of my favorites on here.


    Sent from my iPhone using Tapatalk
     

    Doco Overboard

    Ultimate Member
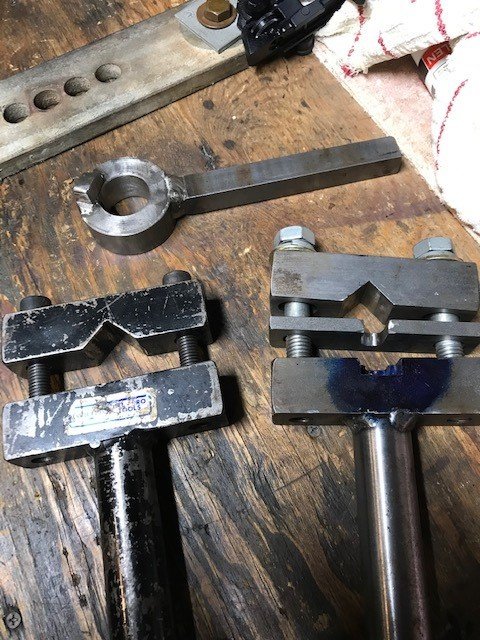
    Here's a shot of a few action wrenches. One fits a Krag(round), the black one the one we'll be using... Mauser-Springfield, Enfield m14-17 and other flat bottomed actions and the other multi-part one, Arisaka... LE no 1-4 or whatever it will grab without slipping. I have a Garand wrench but didn't need to move it out of the way in the chest to get to the black Wilcox wrench we'll be using here.

    01.jpg

    In this picture you can see the index line sculpted into the rear collar. Just to the right on the action body there is an index mark that needs to be brought together with the other one. Underneath the collar is another index mark that can be used to torque the barrel and then the collar will be driven over the top of it. When hand tight you want to see the index marks less than 1/4 " but more than a few 16's before meeting.
    Theirs also a gross wild hair that must have gotten yanked out of my arm messing with all this stuff. Eck.

    02.jpg

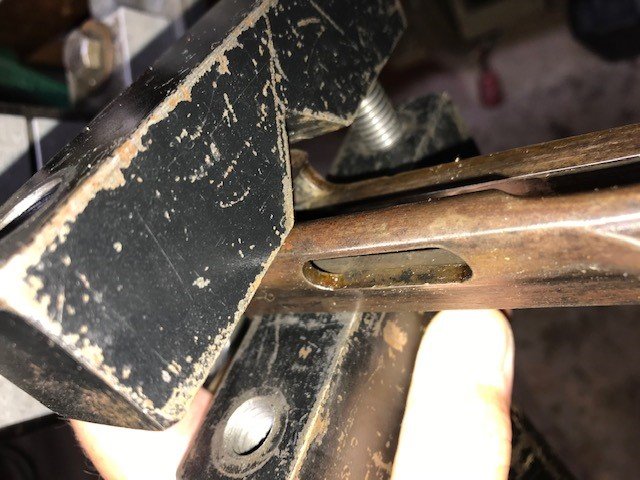
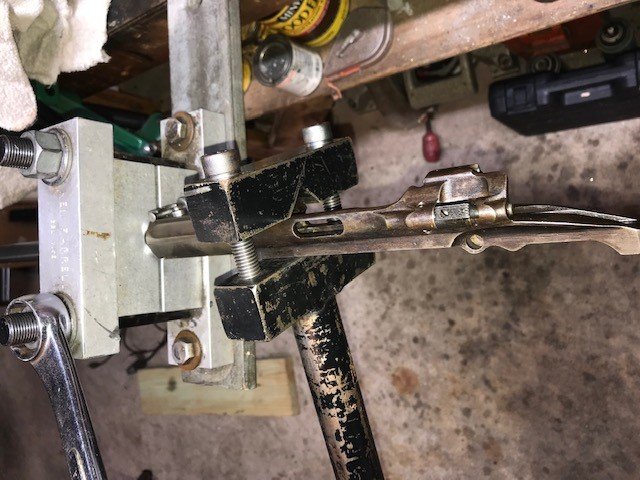
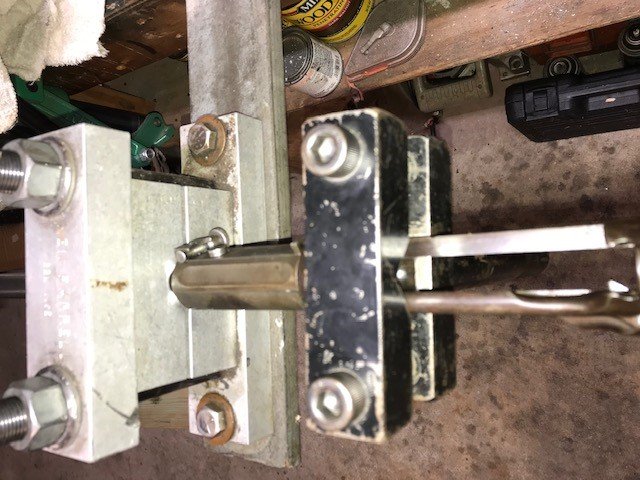
    We need to make sure the action wrench is evenly tightened to the front ring of the reciever. The bottom flat should be pushed up against the flat portion just below the bolt lugs and then even tension applied to the allen screws that draw down the top section of the wrench down to draw the two halves together. You must securely tighten the wrench to avoid slipping or marring the reciever ring. We don't need to worry about that here because the finish is so poor to begin with. We can re-phosphate it before reassembly if anyone cares.
    On something decent we would take steps to preserve the finish. Like a cut up Natural Light or Code Red soda can. That polished 100 mph tape will do just as well also.

    03.jpg

    I usually tighten the barrel in the vise so I can use my body weight and locked arms to pop the reciever loose.
    I'm not short on body weight these days but notice how the action is turned to get the most leverage anyhow. The handle is pointing slightly downwards.
    When you need to slip a cheater or give a good whack with a drilling hammer, the handle should be more towards level or slightly upwards for best leverage-persuasion.

    04.jpg

    One big shove and its done. Time to remove the wrench before we unscrew by hand the reciever. The receiver is now about a quarter turn loose from the initial position of the sight collar flat. Usually you can get right off the wrench and the assembly will turn off without much effort. If its too tight by hand that could be indicative of poor fitting of the square threads used by SA or other replacement barrel. Sometimes they are sticky and need lapped before reassembly.
    Many of the 03A3 barrels are sticky and should be lapped in to fit. When you take the time do that a noticeable increase in accuracy with good ammo is apparent. 03 barrels are usually right on the money and require very little to no lapping. Ive done a few CBI barrels that are tight. Square threads are not as prevalent today as they were then and require a high degree of skill to lathe cut to fit just right over a multitude of action bodies.
    They should not touch at the top and bottom of the threads and need specific amount of clearance to be entirely satisfactory. The 03's crush at the reciever face and remain tight by the pitch of the threads and not so much by exterior tension at top and bottom of threads to prevent galling as the thread is advanced.

    05.jpg


    Here you can see the rear pin location form the paired up parts between the collar and original location of the barrel pin. Right about 1230 nearly 1 o'clock. Looks like ther is some sort of weird stuff in there that appears to be a little oval. Maybe its Hoppes mixed with frog lube or something.... anyway you can just make out the bolt weighs. They should be smooth with no perceptible indentation or wear.

    06.jpg

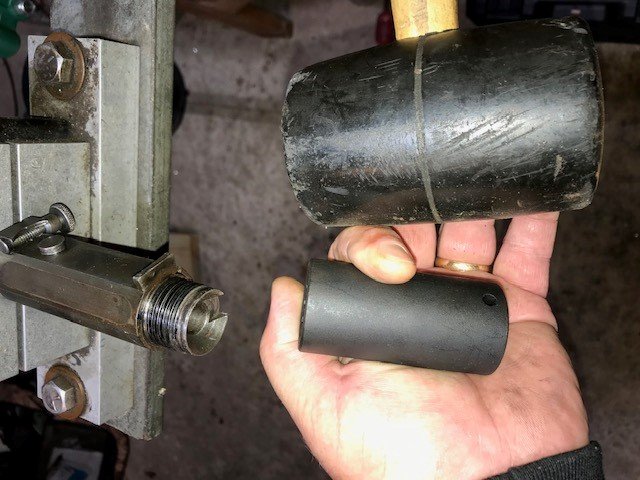
    Here I found an impact socket that fits over the threads to just give the collar a bump to get it started moving. These collars are not easy to come by but usually are already installed on an in the wrap barrel which are very hard to find these days for an 03. The collars are very malleable and delicate in the way they do not take a a whole lot of abuse. Once they are in place they are reasonably durable and completely reliable in rough conditions. CHi-com re-pops are out there but I'd never used one. Ill have this one soldier on for another 90 years and theirs no way I would knowingly allow that garbage on even a beater rifle like this one.

    07 (2).jpg

    Dont beat it up or where it meets the front ring will really like garbage. If you hit that outer periphery it will dent. Let me repeat that, it will dent or tear that outer edge.

    008.jpg

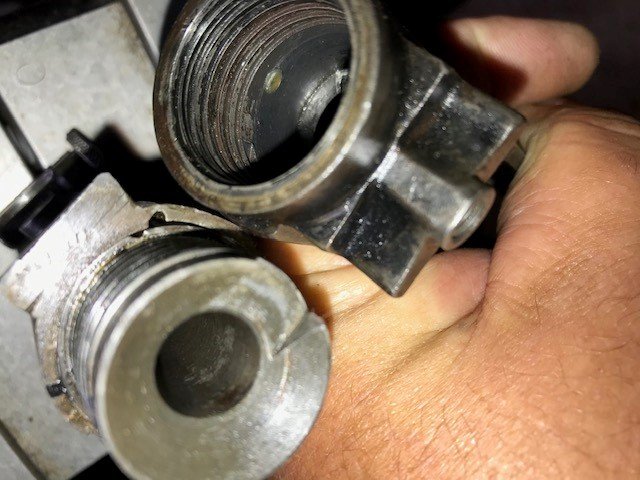
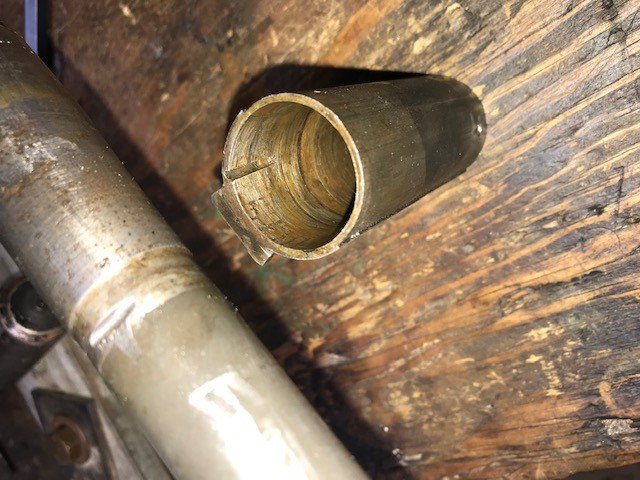
    Image of the collar insides and the locating grooves on both components


    009.jpg

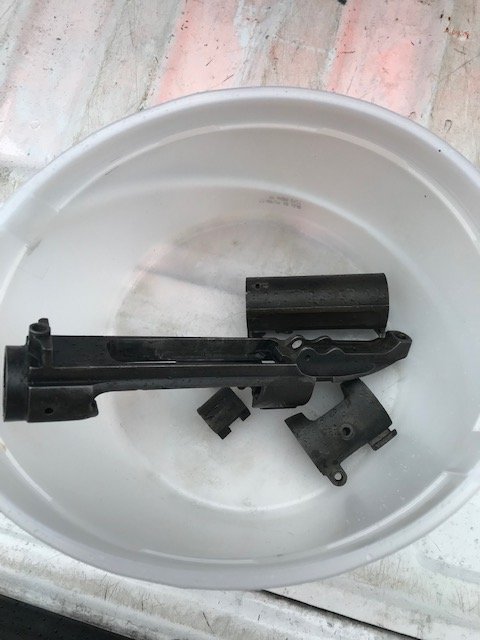
    When your through, you should have a few parts that look like this.
    Im going to take the reciever, collar and front site band and bead blast them then blacken them to improve the appearance somewhat.

    We can get into that soon enough.


    10.jpg
     

    Doco Overboard

    Ultimate Member
    I forgot to add this one in the other day. It's how the index marks appear at the reciever, barrel and the rear sight base.

    12.jpg

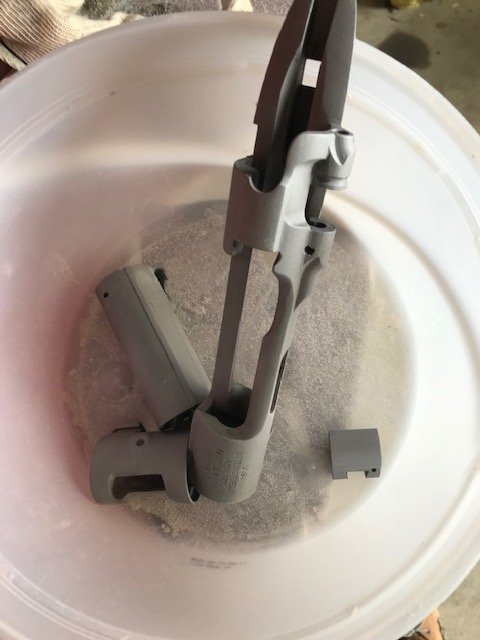
    Here's some of the components prior to bead blasting. Figured I would try and improve the appearance some.

    IMG_1945.jpg

    Blasted clean with glass.

    IMG_1946.jpg

    Blackened darker than the Ace of Spades at Midnight and drying out after being neutralized in water and baking soda.

    IMG_1947.jpg
     

    Doco Overboard

    Ultimate Member
    What method did you use to blacken those parts? They look very nice.

    Mark Lee Express blue. Its just like phosphate unless you polish the parts real brite.
    I wish they made it so that you could get a green finish like park.

    It's real durable and has a tendency to polish up just right with use.

    Super easy to use.
    De-grease parts with dish detergent, glass bead, don't touch with hands, boil water, let evaporate and coat with solution. Boil again to get black, neutralize and then oil.
     

    noahhh

    Active Member
    Jan 28, 2009
    254
    Arnold,Md
    What barrel will you put back on? I used a 6-32 barrel on my last 1903A1 earlier this year. Bought it from a guy who swore it was a wartime replacement barrel. (Sometimes it pays to unwrap stuff before you sell it, haha!) The one before that was a new Criterion barrel I put on my ersatz 1903A1 USMC Sniper- and I swear it shoots better than my original National Match 03A1 with Star Gauged barrel. I have another nice pre-war barrel waiting for a home, but it ain't going anywhere!


    Shame about that Avis barrel you took off. They had a reputation for good accuracy, and it was a perfectly period correct barrel for that receiver.

    Man, you're doing everything right! Can't wait for the next installment- your presentation is way better than anything I could've done!
     

    Users who are viewing this thread

    Latest posts

    Forum statistics

    Threads
    275,323
    Messages
    7,277,216
    Members
    33,436
    Latest member
    DominicM

    Latest threads

    Top Bottom